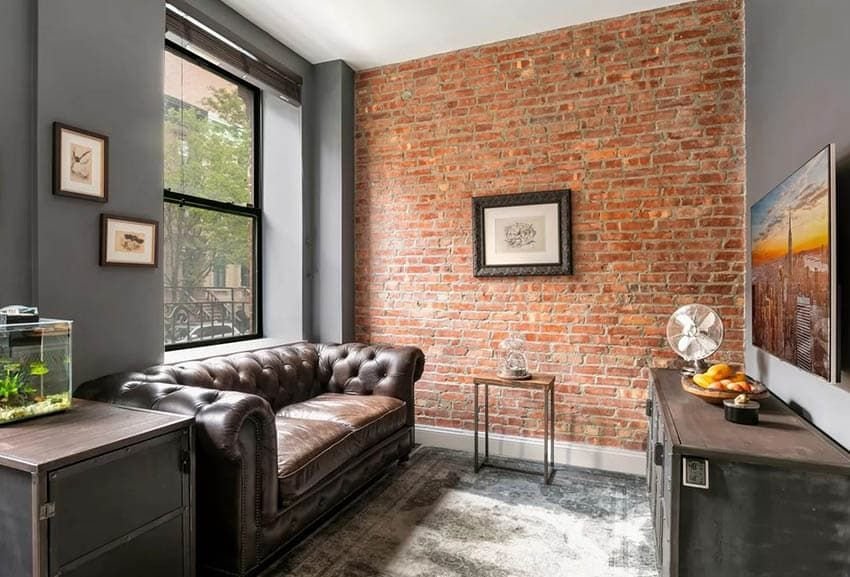
Painting a room with exposed brick walls can be a beautiful addition to any home. With the right colors and techniques, you can bring out the natural beauty of the brick and create an inviting space for your family and friends. Whether you’re just looking for a small change or revamping the entire room, this article will provide you with easy-to-follow steps on how to paint a room with exposed brick walls.
Painting Exposed Brick
Painting the exposed brick can be a unique challenge, but with the proper preparation and paint selection, it can be done successfully. Before beginning the painting process, make sure to thoroughly clean the brick walls with a trisodium phosphate (TSP) cleaner to remove any dirt and grime. Once dry, use a primer designed for masonry surfaces; this will help create an even surface on which to apply the paint. When selecting your paint color, keep in mind that lighter colors can help brighten up darker rooms while deeper shades may provide more of a contrast. Lastly, use multiple thin coats of paint instead of one thick layer; this will ensure that your painted exposed brick is even and uniform throughout. You can visit homedrywallandconstruction.com to know more about the methods of painting exposed brick.
Gathering Supplies & Tools
It’s important to gather all the necessary supplies and tools before beginning the painting process. The most essential items you need are sandpaper, primer, paint brushes, rollers, a stir stick and drop cloths. Sandpaper is used to lightly sand down any areas of exposed brick that may have crumbling mortar or chipped pieces. Primer helps create an even surface for the paint to adhere to more effectively. Paint brushes are used for detailed work such as edging around window frames and outlets while rollers make it easier to cover larger surfaces such as walls. A stir stick helps combine any remaining solids in your paint can after stirring with a brush or roller handle. Lastly, drop cloths should be laid out on the floor along all four walls of the room; this will help protect both your floors from spills and splatters as well as keep dust from entering other parts of your home during sanding and painting.
Preparing the Wall
Before starting to paint a wall with exposed brick, it is important to prepare the wall properly. First, clean the entire surface of the wall with a damp cloth or sponge. This will remove any dust or debris that may have accumulated on the bricks and mortar. Next, use a wire brush to scrub away any flaking or chipping paint from the bricks and remove any old sealant from between them. Once this is done, fill in any large gaps between bricks with waterproof masonry caulk. Finally, prime all surfaces with an appropriate sealer designed for masonry walls before painting.
Applying Primer
After you’ve done the initial prep work and covered any areas that need protection, it’s time to apply primer to your exposed brick walls. Primer is a necessary step in the painting process because it provides a solid base for your paint. It also helps even out any uneven patches on the wall and prevents any stains or discoloration from showing through your finished paint job.
When applying primer, use a brush or roller that’s specifically designed for masonry surfaces. Begin at the top of the wall and work downwards in overlapping strokes, making sure to cover every nook and cranny; if you don’t get all of them, gaps can form between your brushes or rollers which will show up when you start to apply paint. Once finished with priming, let everything dry completely before moving on to painting – this usually takes around an hour depending on temperature and humidity levels inside your space – so plan accordingly!
Choosing a Paint Color
Choosing the right paint color for a room with exposed brick walls can be tricky. Colors that work best are those shades that enhance, rather than compete with, the bricks’ natural hues. Consider both the color and texture of your bricks and how this will affect your decision. For example, if you have reddish bricks, opt for warmer tones such as yellow or orange to create a unified look. If you have more neutral-colored bricks such as white or light gray, then brighter colors like blues and greens may work better. Experiment with samples before making a final choice – put them up on the wall next to the exposed brick to get an idea of how they’ll look together before committing to one color. Your local paint store should also be able to recommend specific brands and types of paints that are most suitable for use in rooms with exposed brick walls. It is a daunting task so you can call us for more details about our services or to get a free quote.
Applying Paint
Once the walls have been properly prepped, it is time to start painting. To begin, use a roller or brush specifically designed for latex paint to apply a base coat. Paint along the edges of the wall first and then move on to larger surfaces. Work in small sections and be sure to keep a wet edge when rolling so that no lines appear when the paint dries. Make sure to get into all of the nooks and crannies of exposed brick as some areas may be more difficult to reach than others. Allow for adequate drying time between coats before applying additional layers of paint if necessary; two coats should be enough for most projects but three may be needed in certain lighting conditions or if you’re using a darker color. Clean up any spills immediately with soap and water as they can cause permanent damage to brick surfaces if left untreated.
Finishing Touches
Once the primer and paint have been applied, it’s time to give the walls a few finishing touches. The goal is to make the brick stand out against the painted wall, while also highlighting any unique features of the brick itself.
The first step is to use a damp rag to lightly wipe down the entire wall with water. This will remove any dust or dirt that may be stuck in between bricks or on other surfaces. Second, add a coat of sealant or varnish over top for extra protection from water damage or fading colors over time. Finally, consider adding a few accent pieces like wallpaper borders or stencils around windows and doorways for an added visual effect. An experienced painter can even create faux-aging effects like staining and antiquing to bring out those exposed brick details even more!
Conclusion
Now that you have successfully painted your room with exposed brick walls, it’s time to enjoy your new look! Take a step back and admire what you have accomplished. With the right materials and techniques, painting a room with exposed brick walls can be an easy process. Make sure to take care of any excess paint or other debris from the project before enjoying your new space. Don’t forget to clean up all of your brushes and rollers as well so they are ready for use in the future. Finally, consider adding some wall hangings or pieces of furniture to complete the new look. With all of these tips in mind, you should feel proud about tackling such a unique project and creating something beautiful for yourself. Enjoy your newly-painted room with exposed brick walls!


